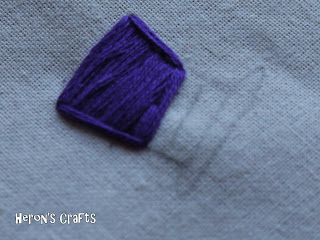
Yesterday I shared a How to Guide to Designing you own Embroidery Cushion. Today, I am going to prove to you how easy it is to embroider it by teaching you the four stitches that I used on my cushion. The first stitch, back stitch, is very straight forward and is the stitch I use most when embroidering.
Note - in the tutorial I use the measurement 'half a centimetre' a lot - this is a rough estimate of a stitch size - simply judge the size of your stitch for your given project for this instruction!
I hope you find this useful! If you have any questions, please don't hesitate to ask!
Back Stitch
This stitch is perfect for general embroidery, words, outlines of shapes etc.
1. Thread needle up from the back at your starting point2.Finish first stitch by stitching down about half a centimetre
3. Bring needle back up about half a centimetre away from end of first stitch
4. Bring needle down in the same place that you ended your first stitch
5. Repeat steps 3 and 4 to get another stitch. Repeat until your design is complete.
Satin stitch
This stitch is perfect for filling in parts of your design
1. Bring needle up at starting point
2. Take needle down directly across from your starting point, as per your design
3. Bring your needle back up just under starting point
4. Complete stitch by finishing just under first stitch, as in the picture
5. Repeat this stitch, staying very close together to fill in your shape
6. To neaten the edges, bring the needle up at one end of you filled in design
7. Take the needle down at the other end, this creates a neat border and tidies in any uneven stitches
8. Repeat on the other side
Chain Stitch
I like this stitch as it adds some variation to the standard back stitch
1. Bring needle up at start point. Take down again very close and bring up about half a centimetre away, as in the picture, leave the needle in place.
2. Bring thread round needle as shown
3. Pull the needle through to finish the stitch
4.Start the next stitch by going down at the end of the first stitch and coming back up half a centimetre later. Loop thread round as in step 2 and complete stitch.
5. Repeat stitches until you have a chain
Double Chain Stitch
This is a decorative stitch - I used it to outline the MET on my cushion, to create a frame effect
1. Bring needle up at starting point
2. Take needle down, about half a centimetre to the right and bring up half a centimetre vertically, as shown in the picture. Loop the thread under the needle. Pull through
2. For second stitch, take needle under/bring back up where you originally started, back on the opposite side. Loop the thread round and pull through. For third stitch, switch back to right side, starting at the end of the last stitch.
3. Repeat until you have a double chain as desired
And that is it! With these stitches, you will be able to create your very own embroidered cushion! I would love to see if you give this a go yourself!
Have a great day
Love Rebecca


Thank you!! I pinned this so I can come back here for the great tutorial.
ReplyDeleteGreat and useful tutorial :)
ReplyDeleteVisiting from adorned from Above linky, what a excellent tutorial! I have been wanting to try some embroidery for ages now, I really must:)
ReplyDeleteAlison
x
new follower
Hi Rebecca,
ReplyDeleteThanks so much about your embroidery stitches utorial.
Have you received the email with a Award that I sent last week?
Have a wonderful week!
Hugs from Portugal,
Ana Love Craft
www.lovecraft2012.blogspot.com
Wow...thanks for that! It makes me want to go make something right now. Hmmm... what to design?
ReplyDeleteThe designs are beautiful, such a fabulous display of sewing patterns
ReplyDeleteGlad you liked them!
Deletei love it!!!! Nice stitches!
ReplyDeleteHi Rebecca,
ReplyDeleteI have featured this post as one of the featured bloggers from Wednesday's Adorned From Above Link Party 22.
It will be posted on tomorrow's post.
Thank you so much for sharing with Adorned From Above.
Debi @ Adorned From Above
www.adornedfromabove.com
Thank you so much Debi! This has made my day! I will hop over later and take a look!
ReplyDeleteHope you have a great day!
Rebecca
Wow! What talent ~ especially impressive in the years without our modern conveniences! Thanks for sharing!
ReplyDeleteGreat post here. It is full of some great information. I am not very familiar with embroidery but want to learn more for my husbands business.
ReplyDeleteEmbroidery Stitches
I have tried hand stitching with rayon embroidery thread , if its for machine embroidery, then it is extremely slippery and not very fun to work with . .
ReplyDeleteWhat an Awesome post. Just wanted to drop a comment and say I am new to your blog and really like what I am reading. Thanks for the share.
ReplyDelete